PrestaShop 1.7
GCash and GrabPay activation
Upon your account's activation with us, please expect around 5 business days for your account to be activated for GCash and GrabPay transactions. Test transactions can still be made.
Before you begin
Available payment methods
- Cards: Visa and Mastercard
- E-wallet: GCash and GrabPay
Supported versions
The PayMongo PrestaShop module is available for PrestaShop versions 1.6 and 1.7. A minimum PHP version of 5.6 is also requiredSupported currency
Your PrestaShop store must be set in Philippine peso (PHP) to use PayMongo. It will not work for other currencies.
If you have a PrestaShop store, you can integrate with PayMongo with no coding at all! All you'll need is a PayMongo account.
- If you don't have a PayMongo account, you can sign up here
Installing PayMongo on PrestaShop
To integrate PayMongo into your PrestaShop store, follow these steps:
- Download the PayMongo PrestaShop module here .
- Log in to the back office of your PrestaShop store.
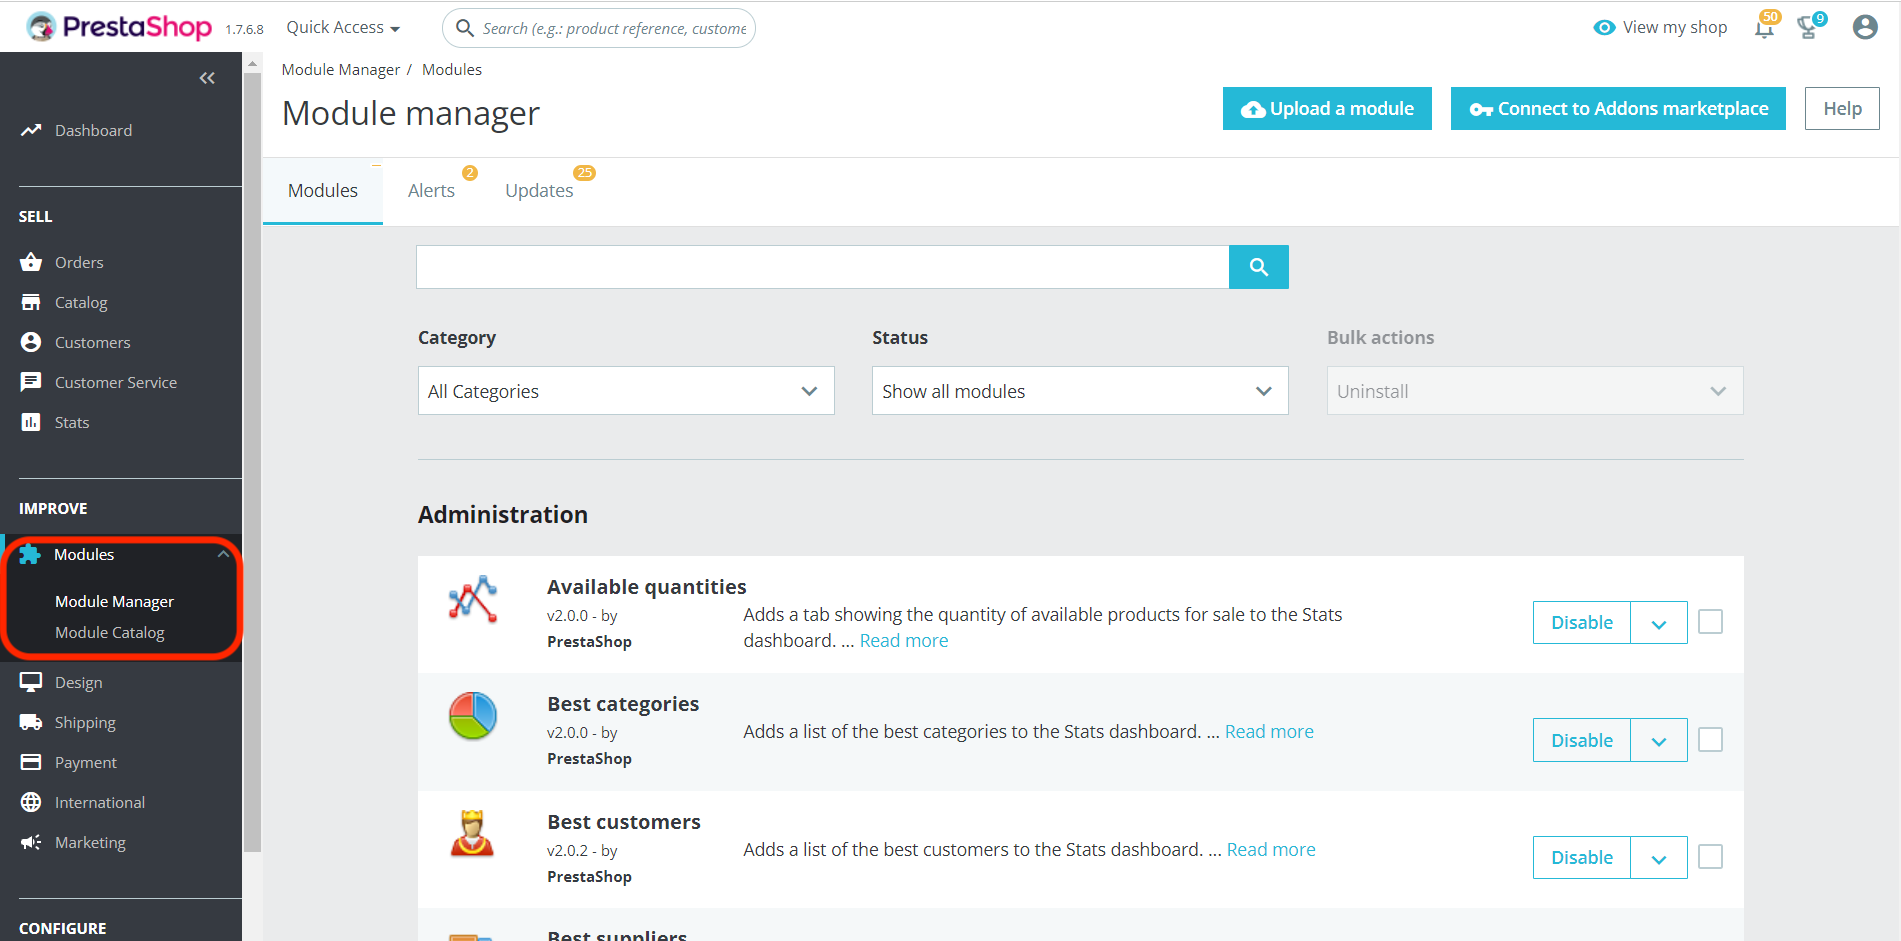
- Navigate to the Module Manager page of the Modules tab under the "Improve" section
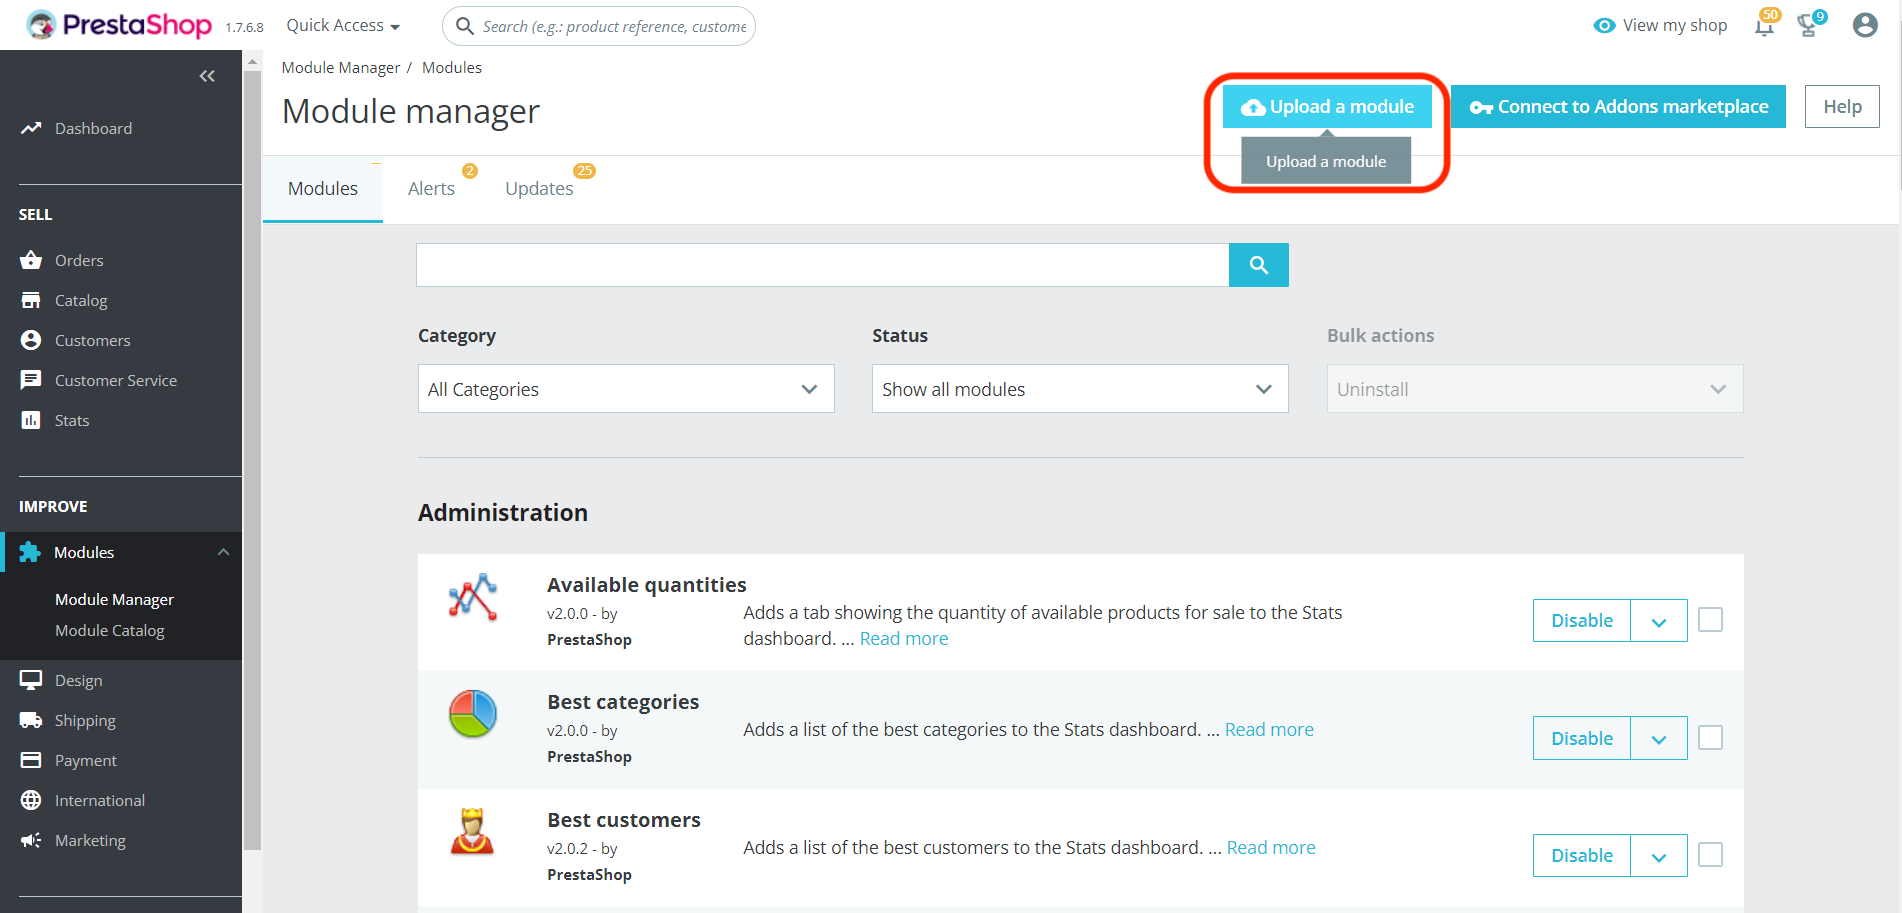
- Click on the Upload a Module button and upload the PayMongo PrestaShop module downloaded from step 1
Payment modules
Make sure to only install PayMongo Payment modules found on this site.
- Get your API keys from your dashboard. Use the toggle on the left sidebar to make sure that you're "Viewing live data". The keys you should be getting will start with pk_live and sk_live.
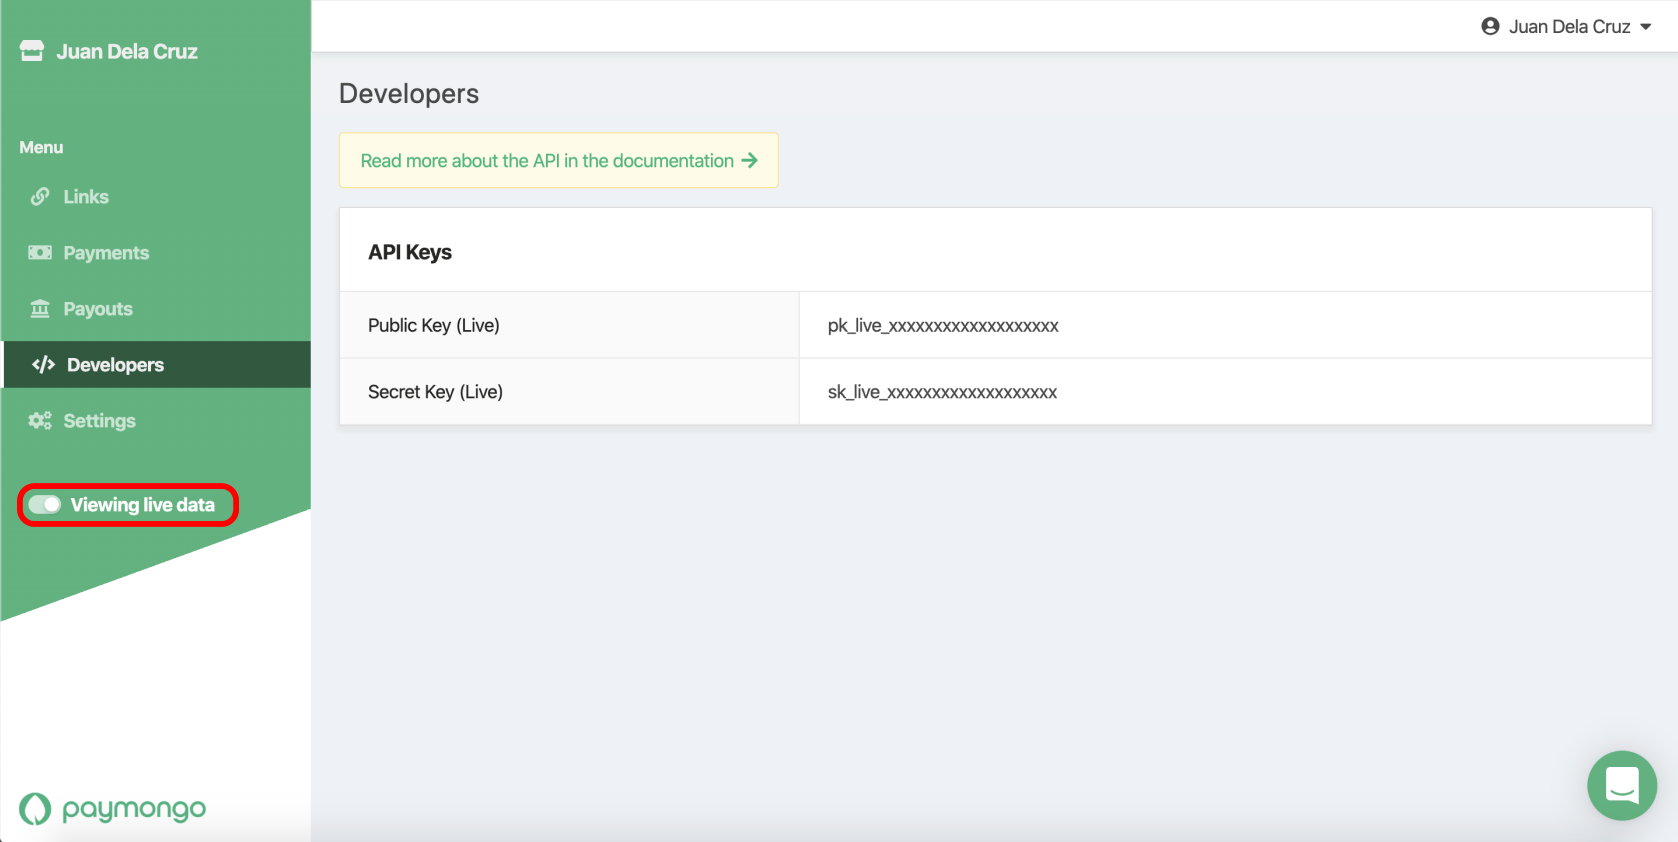
Viewing live keys
To get your live credentials, your account must be approved. To toggle between live and test, use the toggle highlighted above
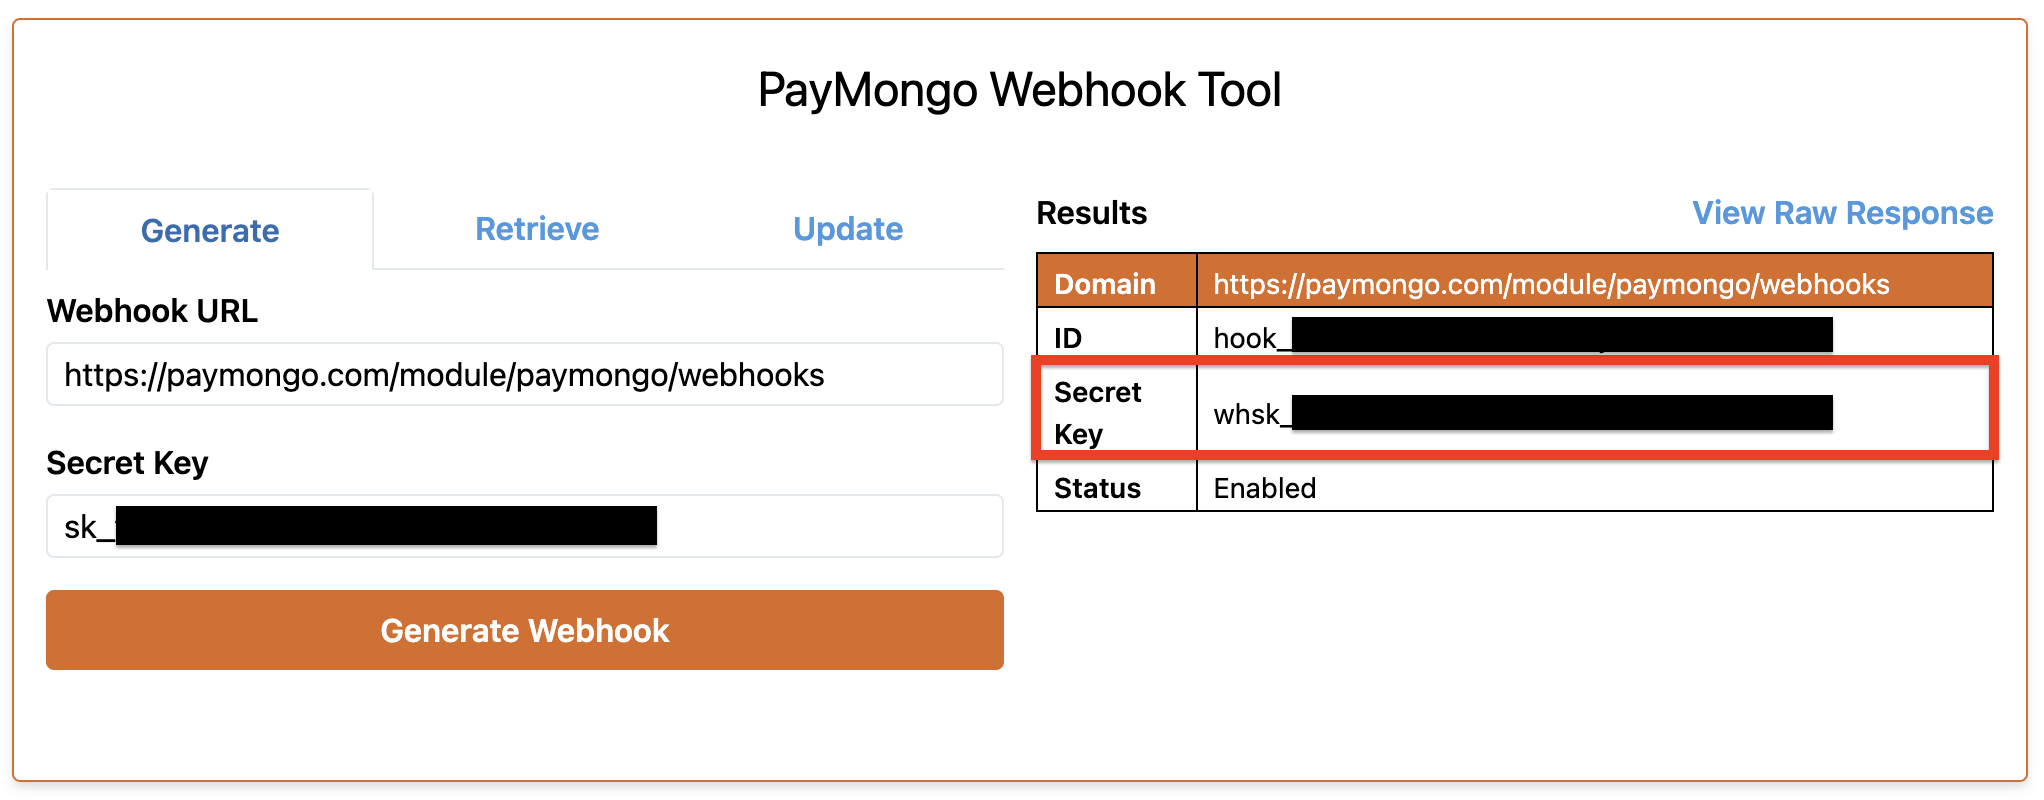
- Create the webhook here, under the Generate tab. Input your secret key (either live or testing, depending on which environment you're generating the secret for).
-
For the Webhook URL - add /module/paymongo/webhooks to your PrestaShop store URL. For example, if your PrestaShop store URL is https://paymongo.com, the URL to be inputted will be https://paymongo.com/module/paymongo/webhooks. Take note whether your site starts with http or https and input it accordingly
-
Click the "Generate Webhook" button and you'll receive the following response. Take note of your webhook's secret key (highlighted in red in the sample image below).
- Input your credentials below. At this step, you may toggle your preferred payment methods on or off.
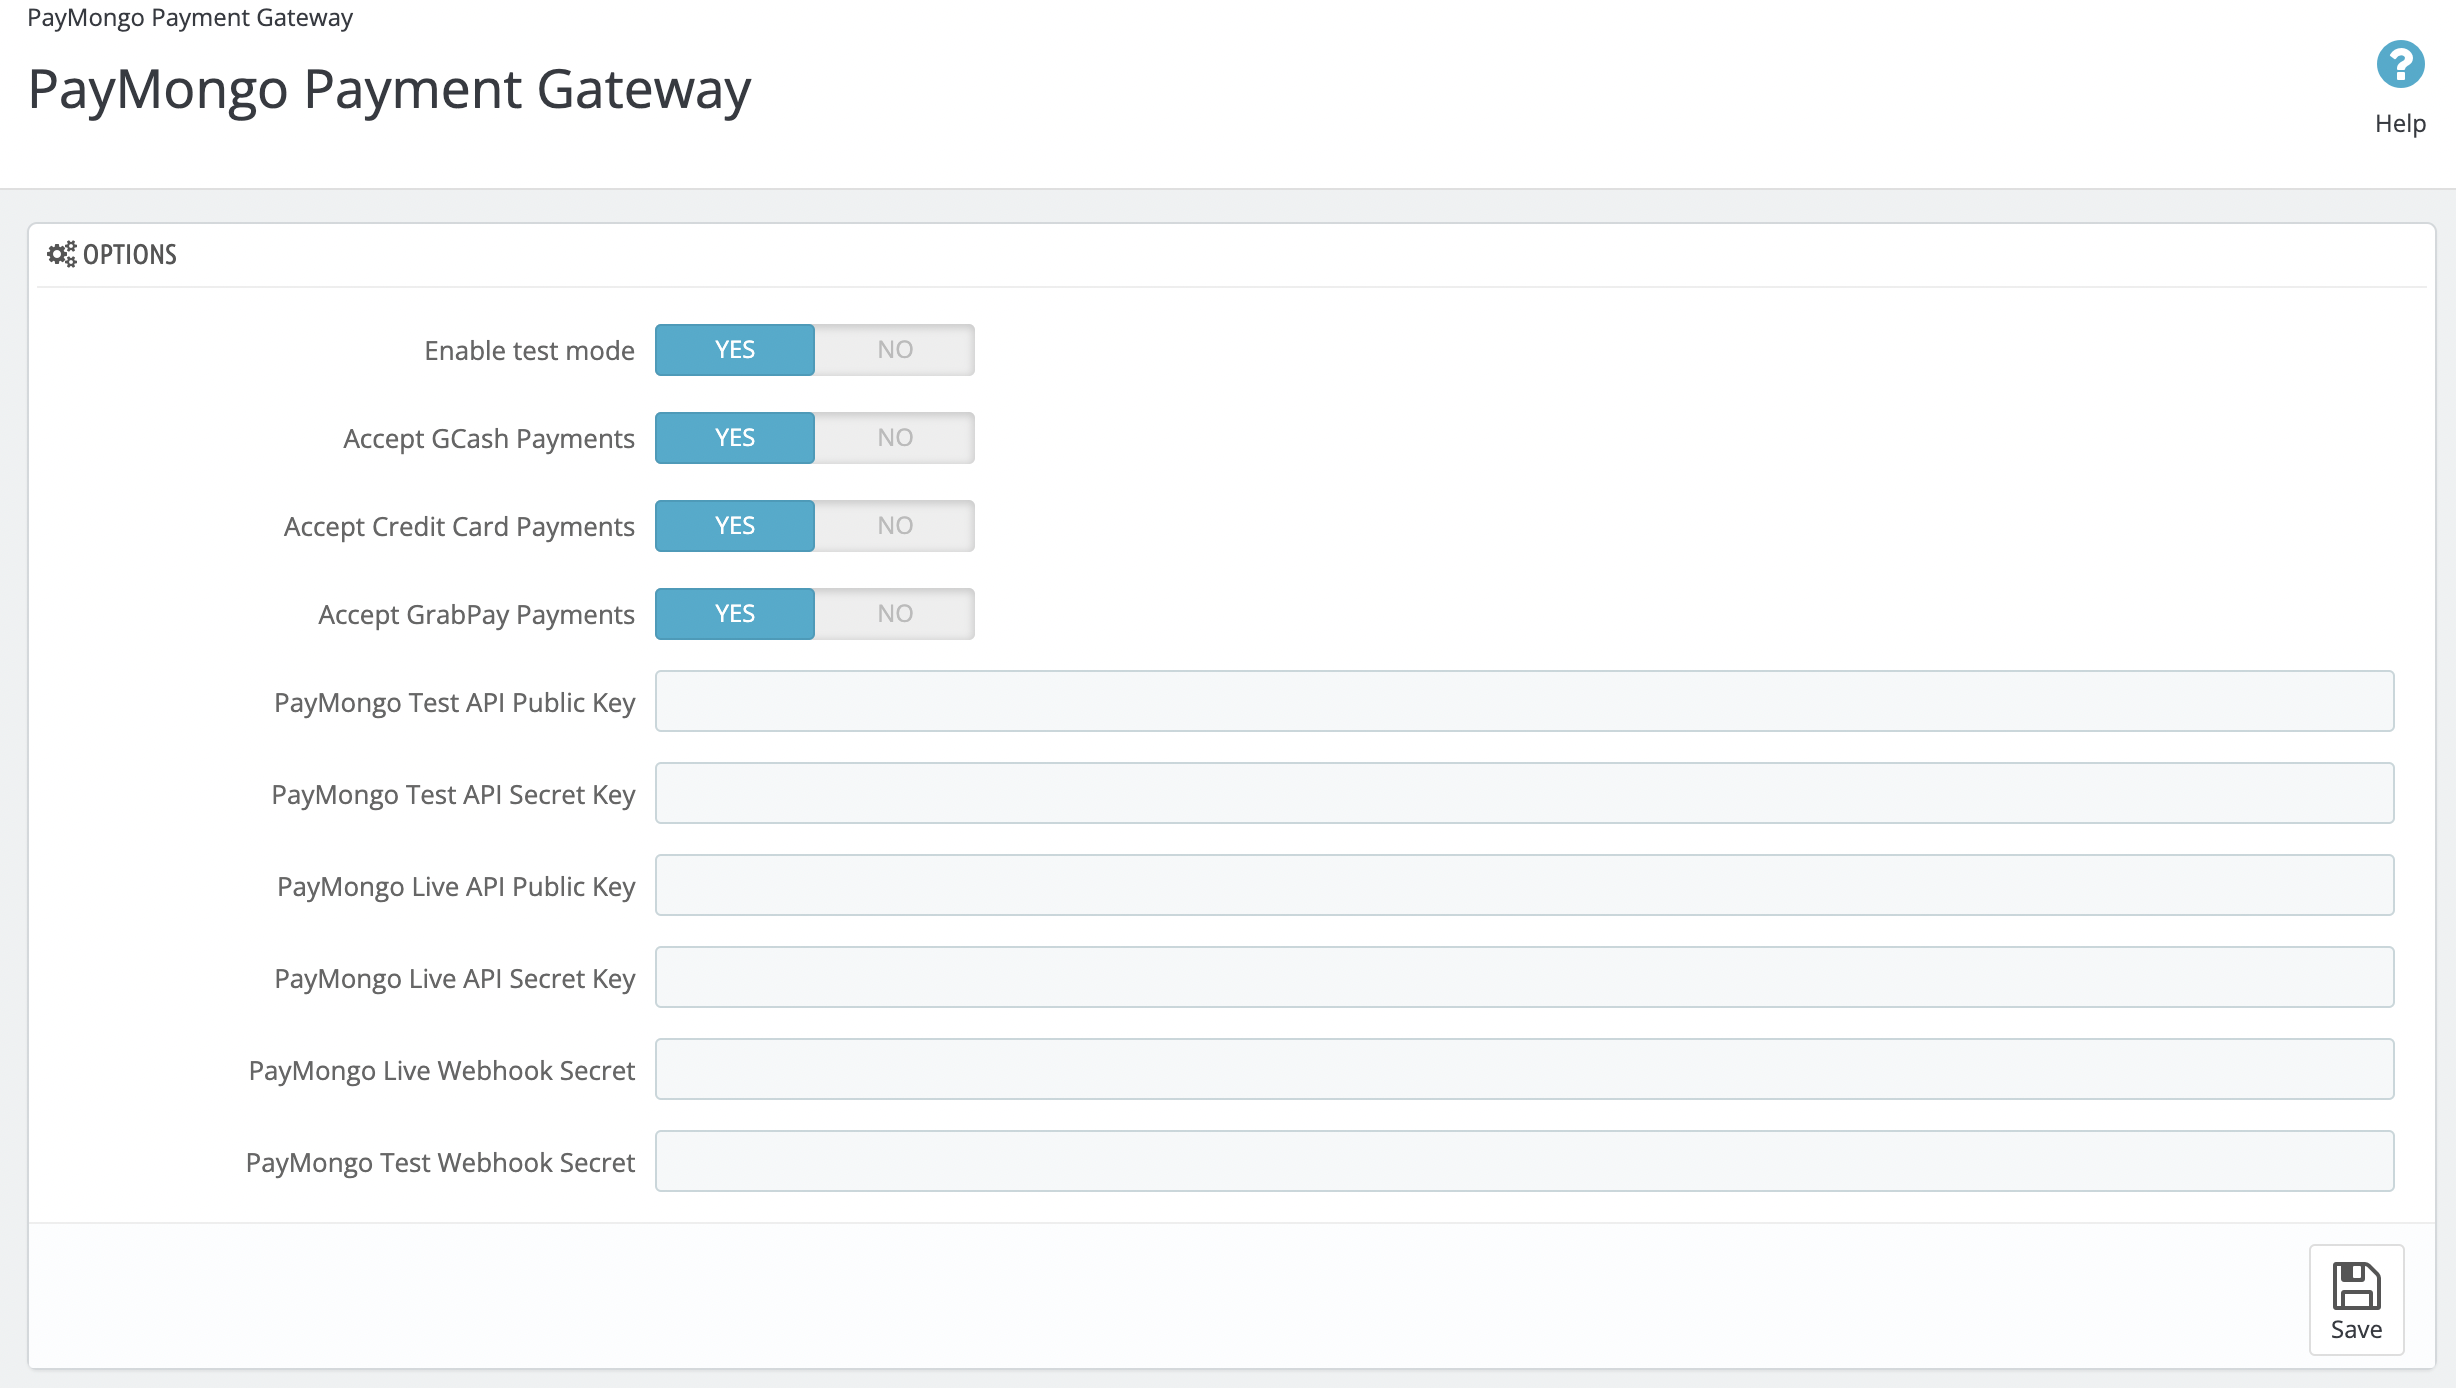
You may toggle between test and live mode here as well.
Congratulations! You've successfully integrated PayMongo into your PrestaShop store.
Updated almost 3 years ago
