Managing team members
Step-by-step guide to inviting, editing, and removing team members on your PayMongo account
Before you begin
- You must be the Account Owner or have the Manage Users role.
- From the Dashboard sidebar, go to Settings > Team members.
Inviting a new team member
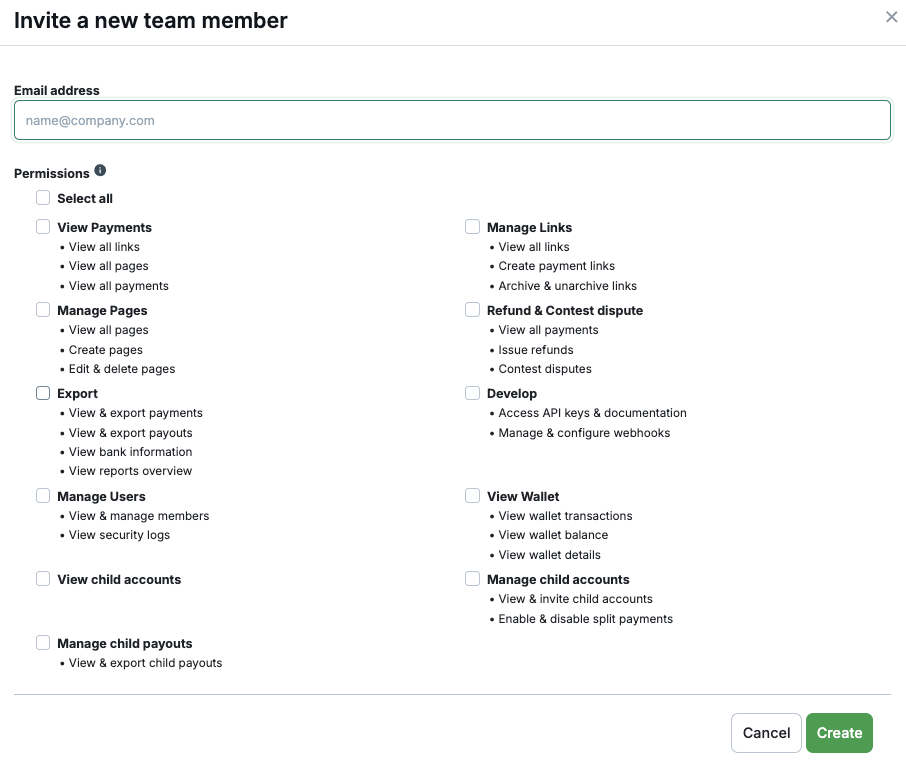
- On the Team members page, click Add team member.
- Enter the team member's email address.
- Under Permissions, select at least one role. You can also click Select all to assign every role. See Roles & permissions for help choosing the right roles.
- Click Create.
- The team member will receive an email with an invitation link.
What the invited person needs to do
The invited team member will need to:
- Click the invitation link in the email.
- Fill out the signup form with their first name, last name, mobile number, and department (selected from a dropdown).
- Create a password that meets the following requirements:
- At least 12 characters
- At least one uppercase letter
- At least one number
- At least one special character: !, @, #, $, %, ^, &, or *
- Click Sign up.
Once they complete signup, they will appear in the Members tab of your Team members page.
Invitation limits
- Up to 150 outstanding invitations per account at any time.
- Invitations expire after 30 days. Resend an expired invitation to generate a new link.
- You cannot invite an email address that already has a pending or expired invitation — resend the existing one instead.
Viewing your team
The Team members page has two tabs:
- Members — shows all active team members with their name, email address, and permissions. You can see what each role grants by hovering over the role labels.
- Invites — shows all pending and expired invitations with the email address, creation date, permissions, and current status.
Editing a team member's roles
You cannot edit your own roles. You also cannot edit the Account Owner's roles.
- Go to the Members tab.
- Click the three-dot menu next to the team member you want to edit.
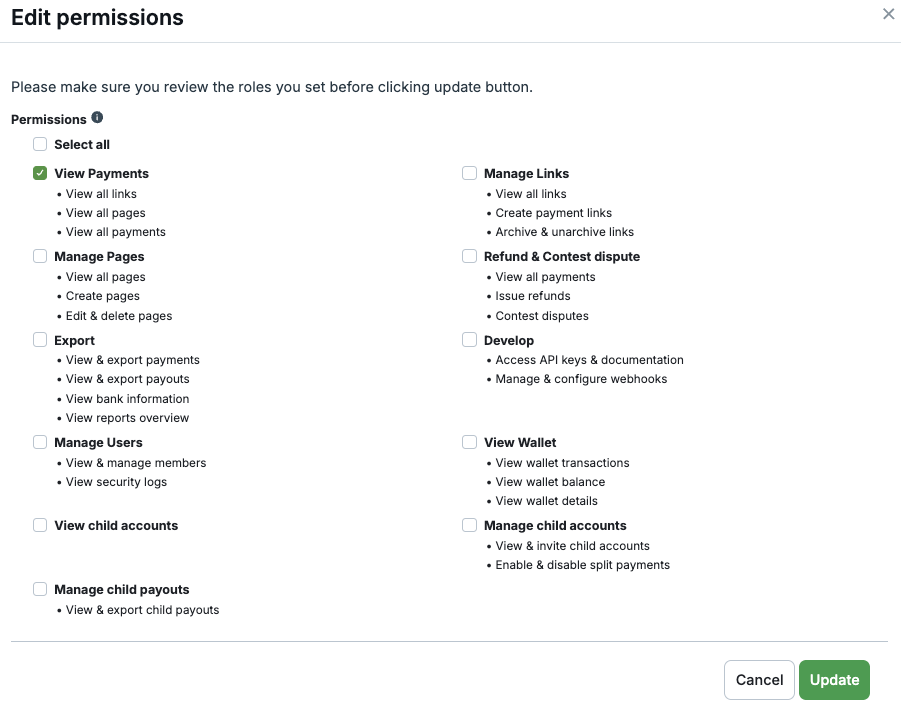
- Click Edit permissions.
- Select or deselect roles as needed. At least one role must remain selected.
- Click Update.
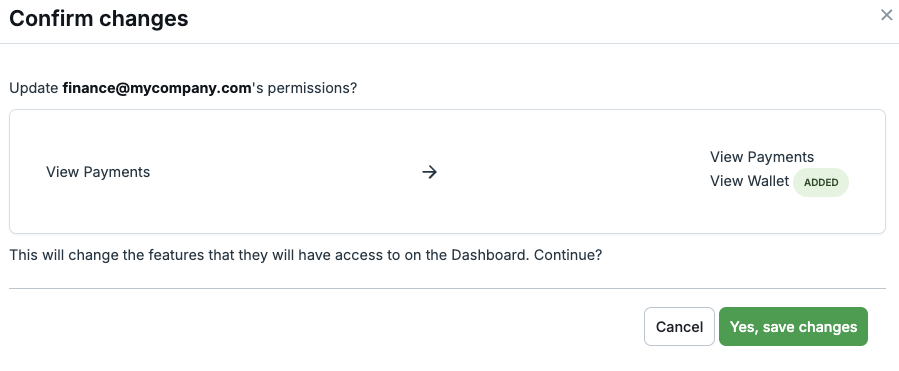
- Review the summary of changes — it shows which roles are being added and which are being removed.
- Click Yes, save changes to confirm.
Removing a team member
The team member will lose access to the Dashboard. You cannot remove the Account Owner.
- Go to the Members tab.
- Click the three-dot menu next to the team member you want to remove.
- Click Delete member.
- Type the team member's email address to confirm.
- Click Delete.
Managing invitations
Resending an invitation
If a team member hasn't received their invitation or the invitation has expired, you can resend it:
- Go to the Invites tab.
- Click the three-dot menu next to the invitation.
- Click Re-send invite.
Resending generates a new invitation link and resets the 30-day expiration. There is a 5-minute cooldown between resends. The remaining time is shown next to the button.
Canceling an invitation
If an invitation is no longer needed:
- Go to the Invites tab.
- Click the three-dot menu next to the invitation.
- Click Delete invite.
- Confirm the deletion.
The invitation link is revoked immediately and the person can no longer use it to join your account.
Updated about 4 hours ago