Installing Secure Payments on Shopify
How do I configure my Shopify checkout page?
Installing Secure Payments on Shopify
Once activated, follow these steps to integrate the PayMongo plugin into your Shopify store:
-
Go to the Secure Payments via PayMongoplugin listing on the Shopify App Store by clicking the button below:

-
Click on the Install button. If you aren't logged in to your Shopify account, a prompt to log in will appear. Once you're logged in, you will be redirected to the next step.
-
You'll be redirected to the plugin's PayMongo account connection page. Input your PayMongo public key and secret key, and click on the Connect button. You can find these on the Developer's tab of your PayMongo dashboard.
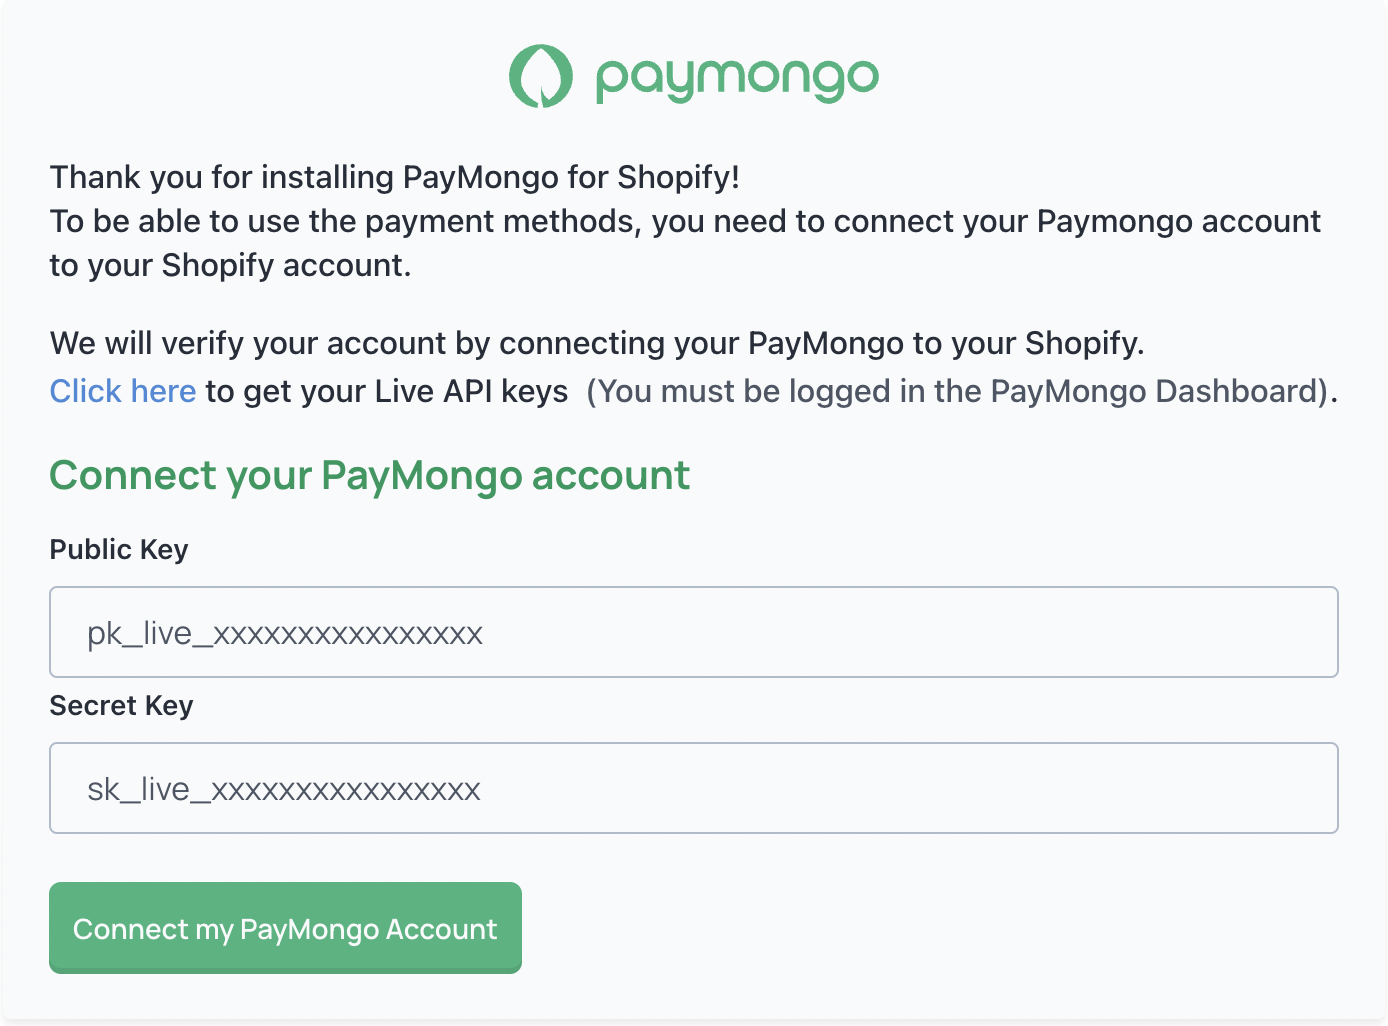
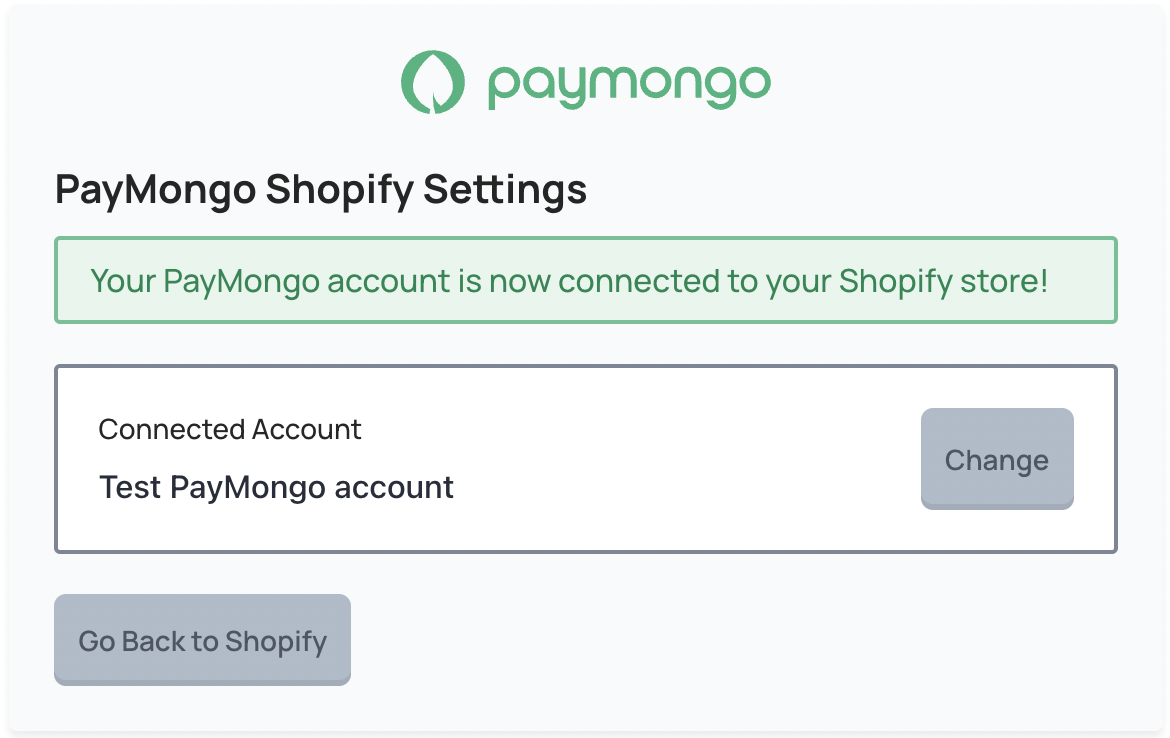
- Upon entering the keys, you'll be greeted with the screen below. Click on the Go Back to Shopify button, and you're done! You should now be able to accept payments via PayMongo on your Shopify store.
- Go to your Shopify settings and continue to the Payment providers section, search for Secure Payments via PayMongo and click "Activate".
You can watch an alternate installation guide video here.
Shopify additional configuration
Editing Payment Methods on your checkout page
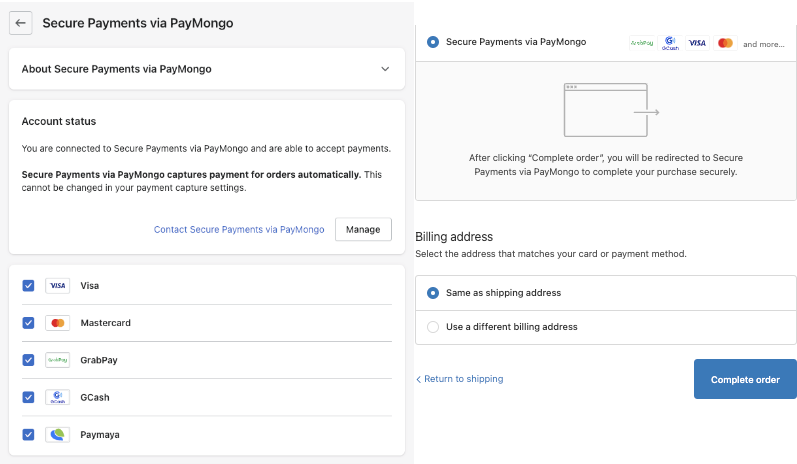
If you have multiple PayMongo accounts or you want to opt-in/out of certain payment methods, you can configure your checkout page anytime by clicking the Manage button on "Secure Payments via PayMongo" plugin settings.
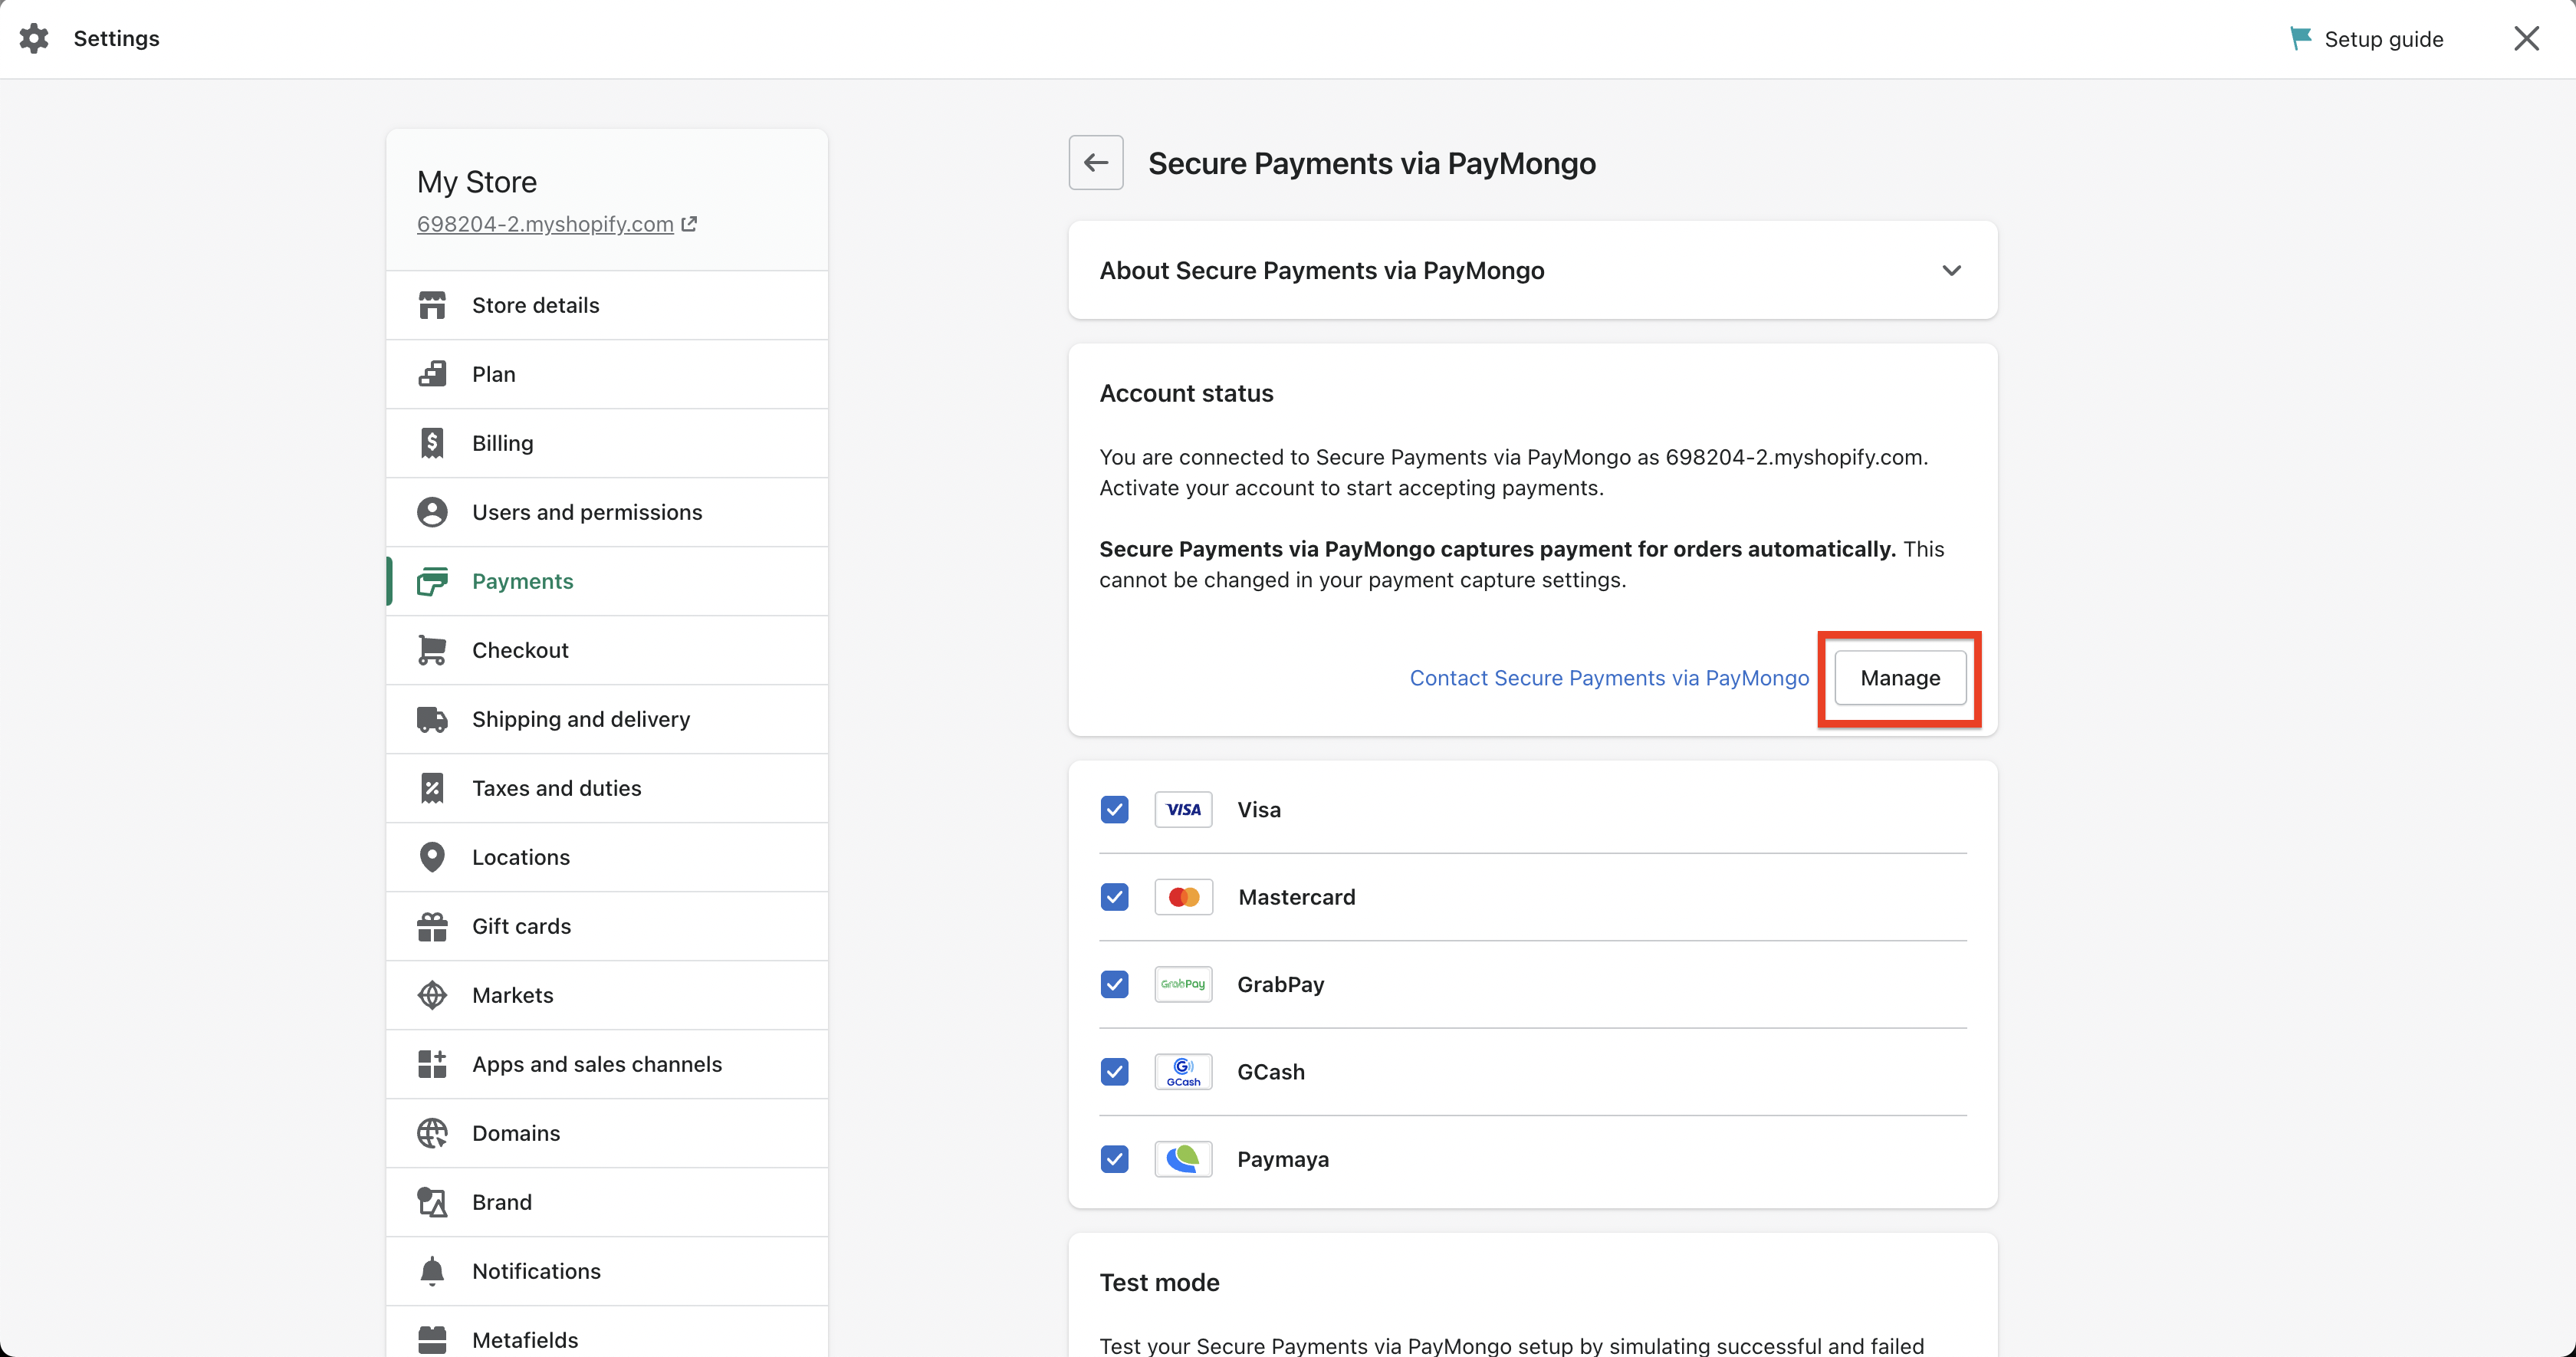
After clicking on Manage, you will be redirected to this screen wherein you can select which payment methods you want to accept in your Shopify checkout or change the PayMongo account associated with your store.
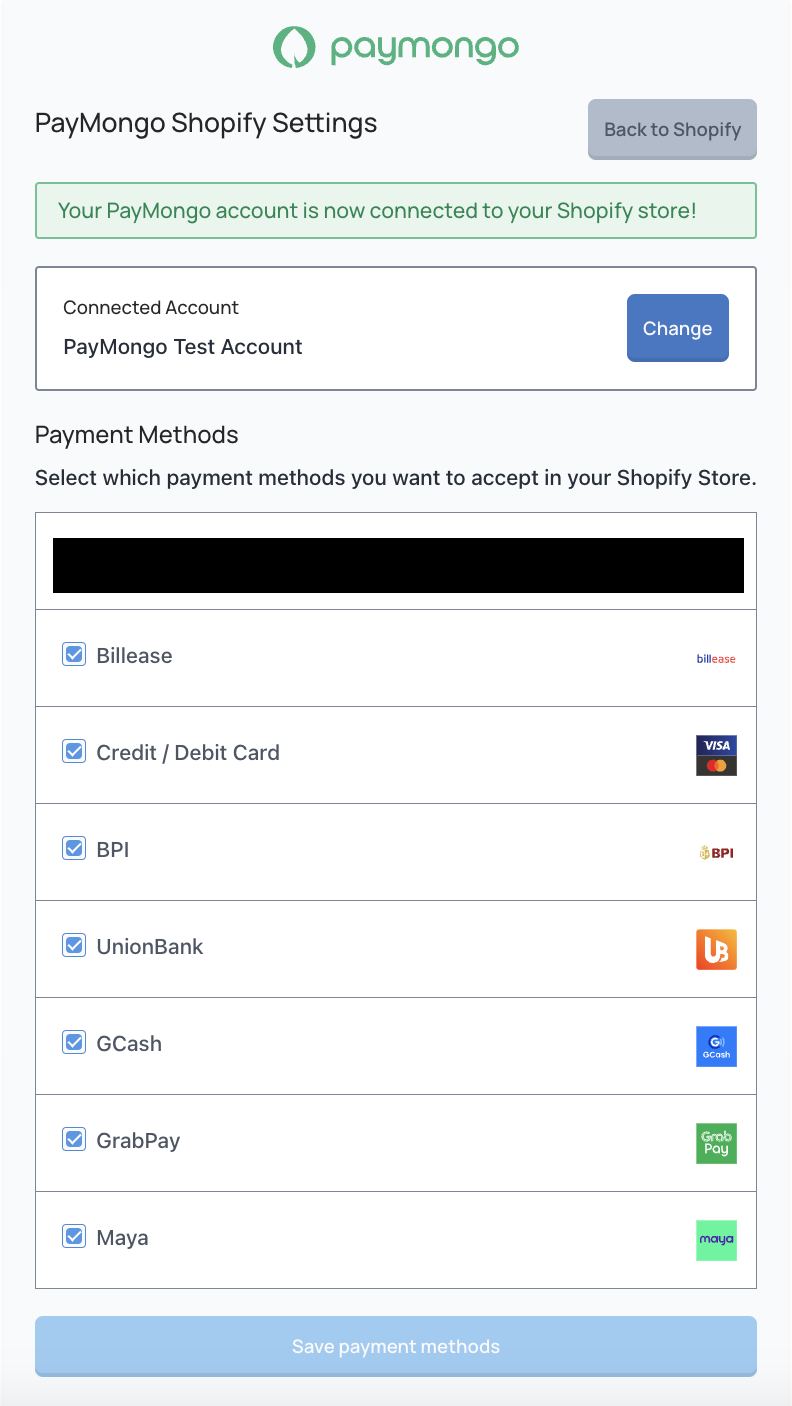
You can then click on the "Save payment method" button to finalize your checkout.
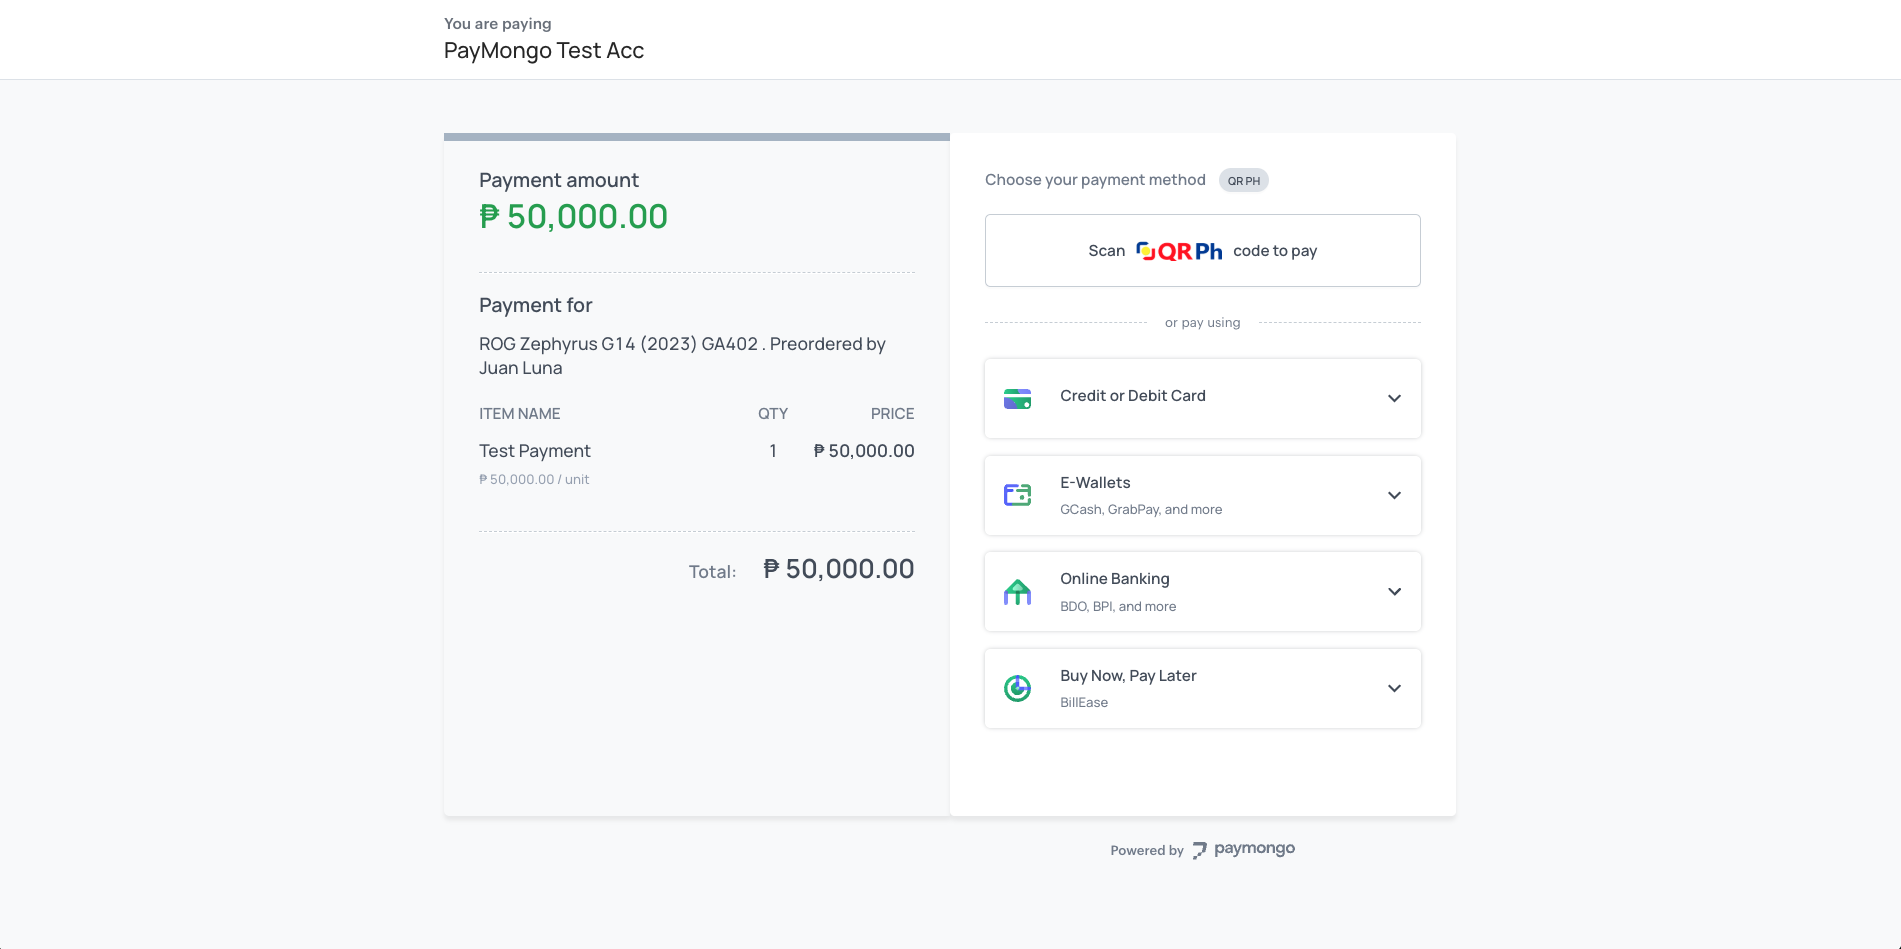
In the example above, this is what the customer will see on the checkout page after saving the updates.
Note: Merchants who have preferred to enable certain payment methods should also ensure the same payment methods are checked/unchecked on this screen (image on the left). This is a different checklist which only impacts which payment method icons appear when a customer is selecting payment methods on the Shopify checkout page (image on the right).
Updated 6 months ago
