Creating a Transfer via PayMongo Dashboard
Learn how to create a transfer through your Wallets Dashboard
Overview
Your PayMongo Wallet is designed to give you seamless control over your funds. This article will guide you through the process of sending money from your PayMongo Wallet to bank accounts or other e-wallets, including how to make single or batch transfers, and important details about the InstaPay and PESONet transfer networks.
Pre-Requisites for Initiating a Transfer
Before initiating a fund transfer from your PayMongo Wallet, ensure you have:
- An activated PayMongo Wallet.
- Sufficient balance in your PayMongo Wallet to cover the transfer amount and the associated fee (PHP 10.00 per transaction).
- The correct recipient bank account or e-wallet details (bank name, account name, account number).
- Access to your registered email address for One-Time PIN (OTP) verification.
Creating a Transfer
You can send funds from your PayMongo Wallet to individual bank accounts or multiple accounts in a batch.
Single Bank Account Transfer
-
Log in to your PayMongo Dashboard.
-
Navigate to your Wallet Dashboard.
-
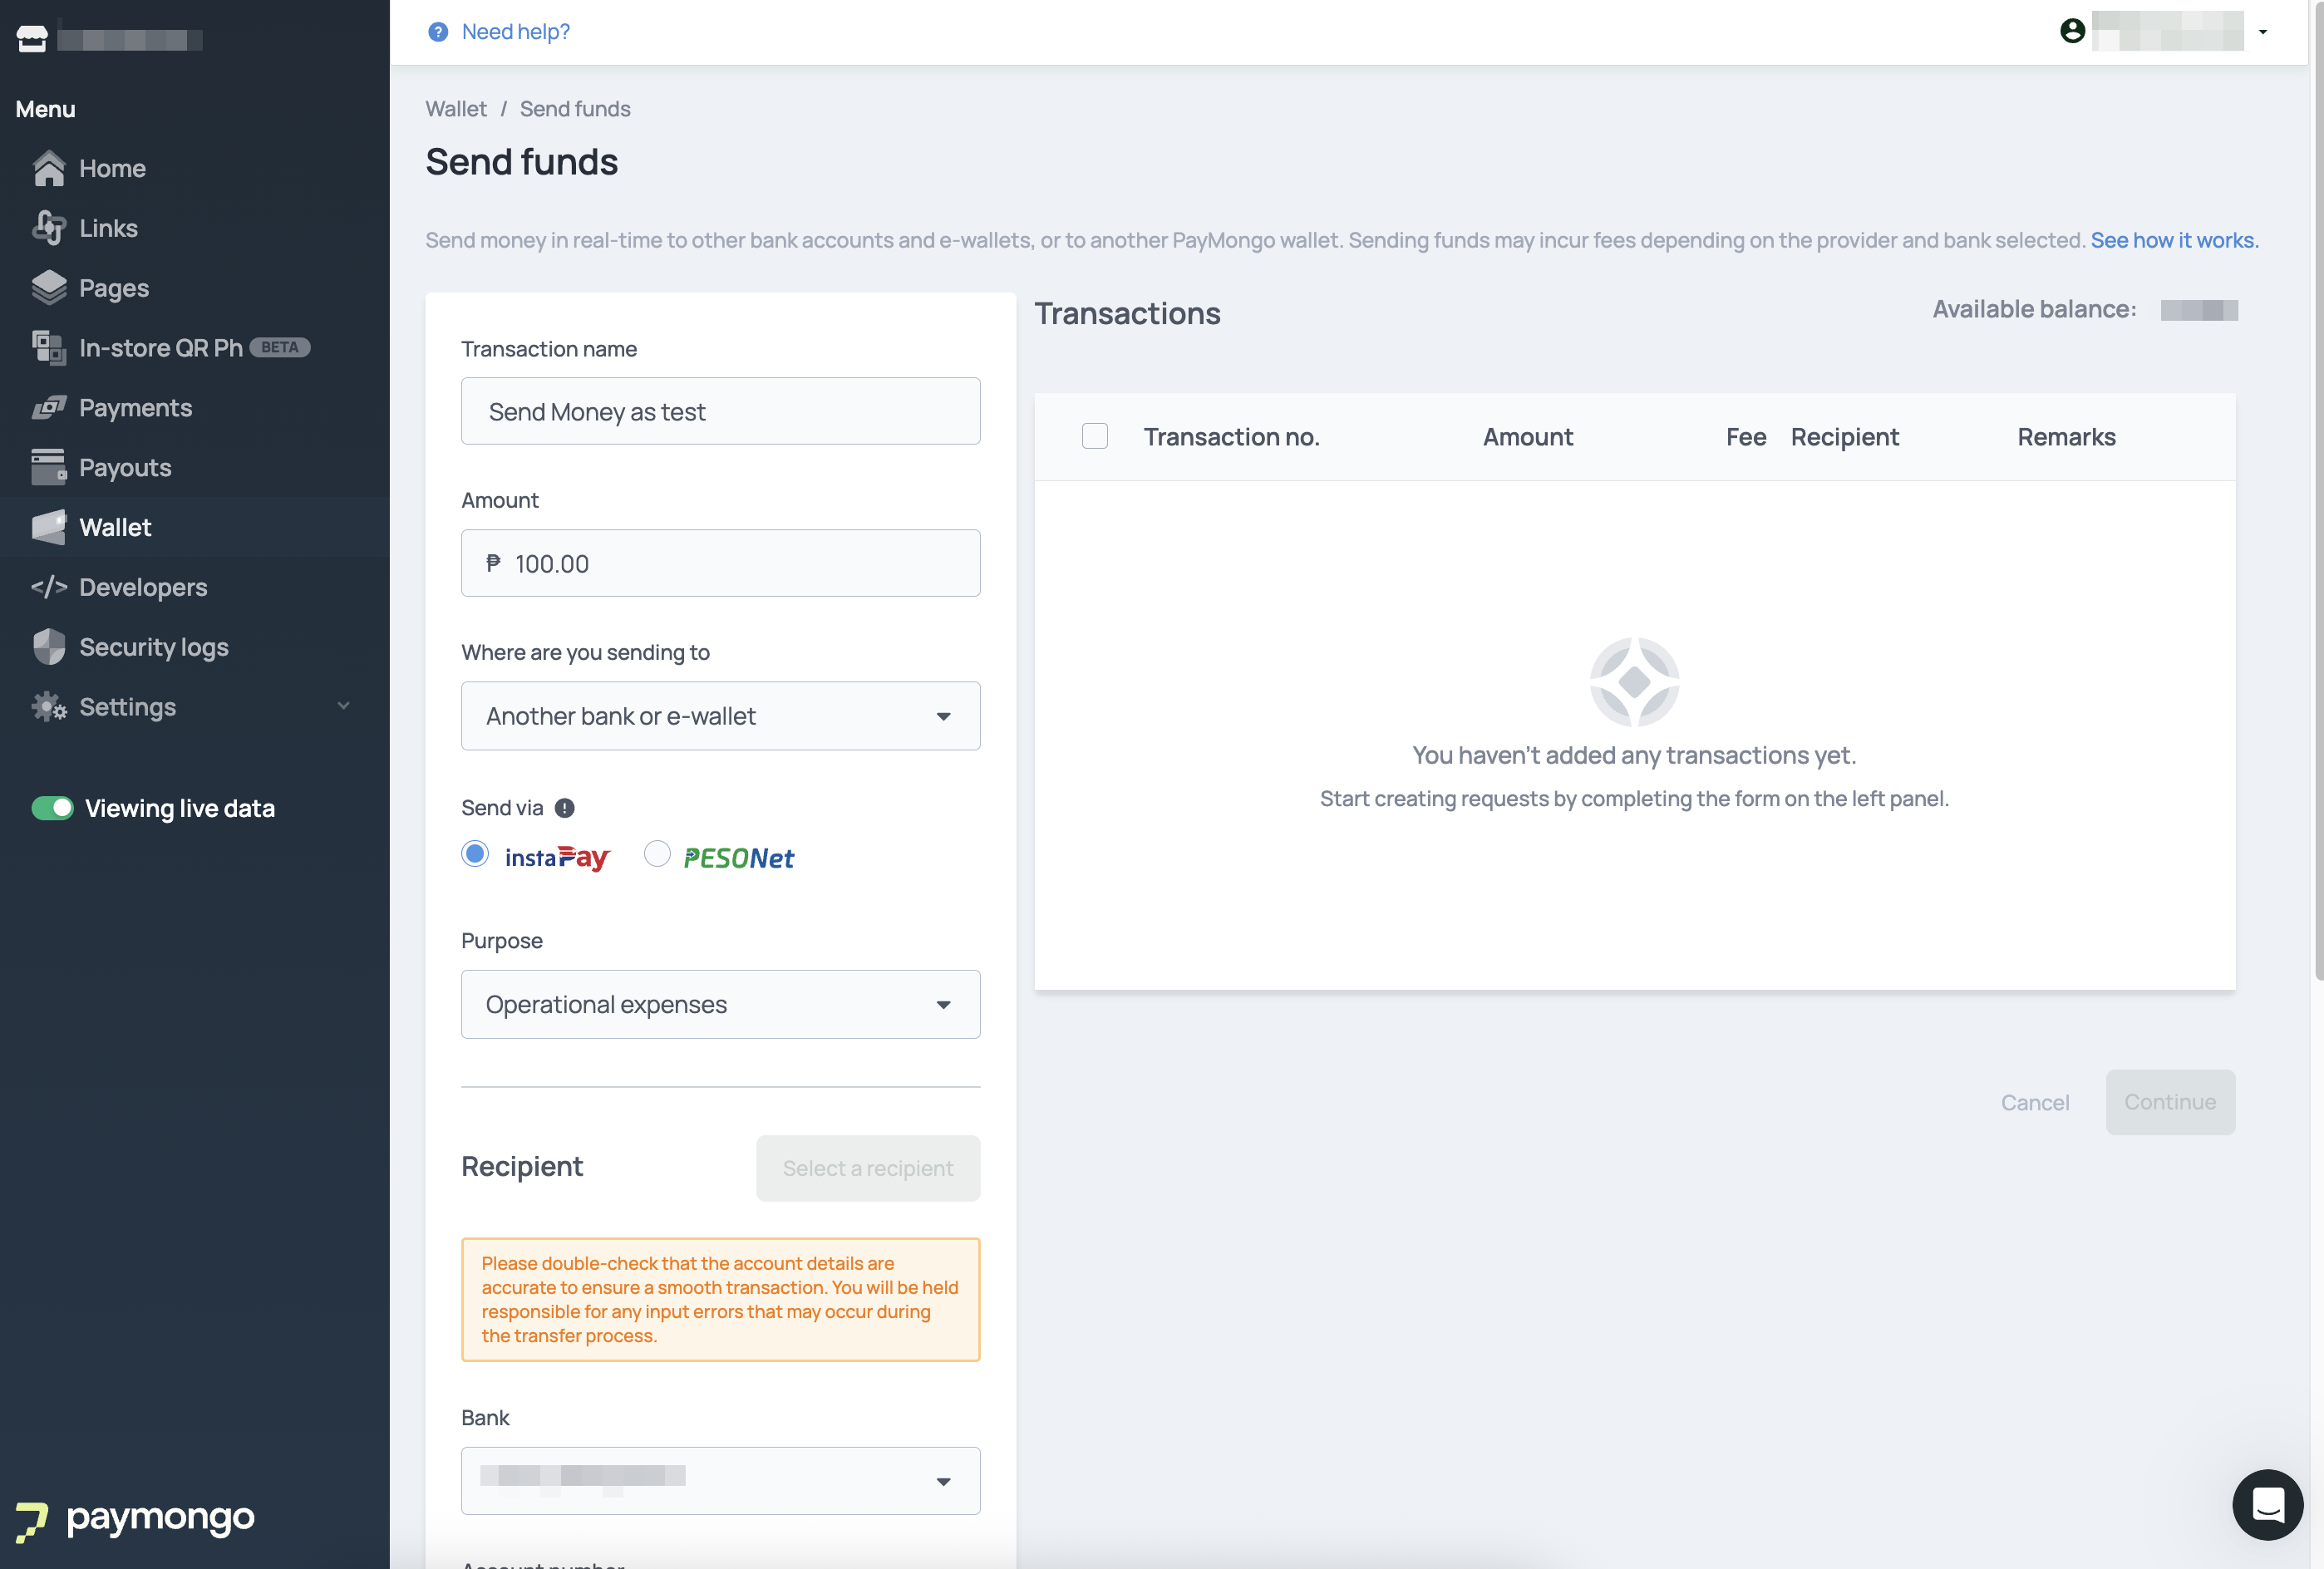
On the upper right side of the Wallet Dashboard, click the 'Send funds' button.
-
Fill out the necessary details for the transfer, including the recipient's bank/e-wallet, account name, and account number.
-
After inputting details, click 'Continue'.
-
Review and confirm all transaction details, then click 'Submit'.
-
Enter the One-Time PIN (OTP) sent to your registered email address to authorize the transfer.
-
Once the transaction is successful, it will appear in your transaction history on the Wallet Dashboard.
Batch Transfers to Multiple Bank Accounts
Inter-Network Transfer Batch ConfigurationPayMongo Wallet currently allows batch transactions only via InstaPay or PESONet. You cannot send via PESONet and InstaPay in the same batch. All transactions within a single batch must use the same transfer network.
PayMongo Wallet allows you to send funds to multiple bank accounts in a single batch transaction. You can add up to 1000 transactions in one batch.
- Click the 'Send Funds' button on your Wallet landing page.
- Input the details for your first transaction (recipient bank, account name, account number, amount), then click 'Add'.
- Repeat Step 2 for each subsequent transaction you wish to include in the batch.
- The details of all added transactions will be displayed in the 'Transactions' table. Review them carefully.
- Click 'Continue' to proceed with the batch transfer, or 'Cancel' to clear the entire batch.
- Finally, confirm your transaction by clicking 'Submit' and entering the One-Time Password (OTP) sent to your registered email.
Updated 2 months ago